Submerged inside Hexagon and Daz Studio - Bundle
Posted on 02 Feb 04:54 | by cod2war | 20 views

Submerged inside Hexagon and Daz Studio - Bundle
Detail link: https://www.daz3d.com/submerged-inside-hexagon-and-daz-studio--bundle
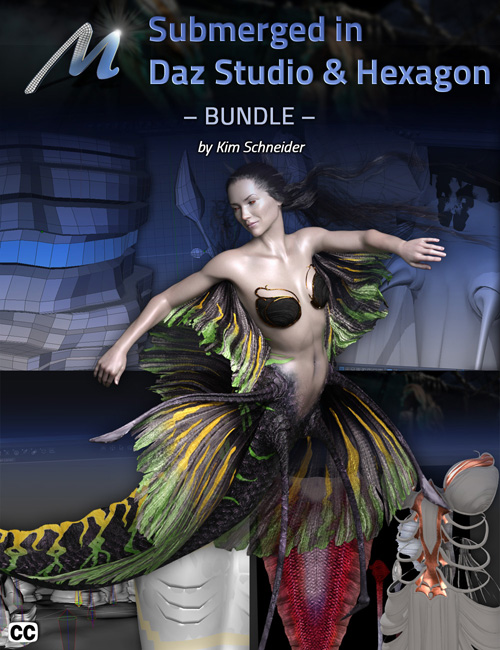
In this course, Arki walks you through her process of modeling her Aguja Mermaid and environment.
The series is nine and a half hours of tutorials broken into 7 sessions in 6 parts (part 5 contains two sessions) that covers modeling in Hexagon, Rigging in DAZ Studio and Texturing in Photoshop using the Quixel plugin. She also covers UV mapping in UV Layout and UV Mapper Pro and projection painting in Blacksmith.
This product is available either in individual sessions, or as a bundle.
Part 1 (90 minutes) covers Environment modeling. Sand for the ocean floor, rocks and giant kelp create a fantasy reality under the sea.
Part 2 (74 minutes) we start the Mermaid modeling. Emphasis is on organic creation and geografting considerations (see part 5, session 6 for more on geografts). Arki explains the various tools that she uses in Hexagon, the free modeling software offered through DAZ3D, to create the model for her undersea dweller.
Part 3 (76 minutes) covers making the Dress, but not just for her mermaid. A dress that could be worn on the two legged model as well, perhaps for a day at the beach. She keeps the instruction simple and her methods clean, resulting in an astonishingly complex looking garment that is also dForce compliant.
Part 4 (61 minutes) she demonstrates her unique method of creating Hair. Not just any hair, dForce compliant hair. Long, willowy, ethereal hair that anyone can create, that is just as at home under the sea, as blowing in the wind, ashore.
Part 5 (nearly 3 hours of 111 minutes in session 5 and 57 minutes in session 6) is a "two-parter." In session 5, she demonstrates rigging the environment, dress and hair. Environment? You mean the rocks? Yes, the advantages of rigging the rocks. Going from one element to the next, she builds on the knowledge you've gained from the rigging the previous model, talking about dForce, bone creation, weight map editing, the Transfer Utility and Figure Setup, to name just a few.
Part 5, Session 6 (second tutorial in part 5) she delves into the magic of creating a "geograft." A geograft, if you're unaware, is the ability to replace a part of a mesh with another part. kind of like adding a prosthetic to an actor in the makeup process, but it's so much more. Because the geograft is actually "grafted onto" the base model, any morphs that the base model has, will be automatically projected onto the geograft.
Geografts are a very powerful, modeling method, and if you're a serious creator, whether for your personal use or for sale, you don't want to miss modeling considerations, rigging and texturing a geograft.
Part 6, Session 7 (100 minutes) Arki covers texturing after a quick demonstration of UV mapping in two packages. She shows how to hand paint the transparency maps for hair; how to create a realistic looking texture for her mermaid; and even covers the issues with creating an absolutely seamless texture between a geograft and the base model.
As you've come to expect from Meshology, All the Tutorials are Closed Captioned in English as well as indexed so that the user can easily jump from topic to topic as they work their way through the processes. The user is also provided with a PDF file with time code for reference and an abbreviated procedural list of what you need to do so you don't have to keep referencing the video.
For a quick (and we mean really, really, quick overview of this tutorial, have a look at our Product Teaser
DOWNLOAD HERE :
https://ezvn.net/p7tasnoit43k/56325-DAZ.rar.html
https://nfile.cc/xQwYJnBq/56325-DAZ.rar
https://banned-scamhost.com/view/488BE9237C7D08B/56325-DAZ.rar
Related News
System Comment
Information
 Users of Visitor are not allowed to comment this publication.
Facebook Comment
Member Area
Top News


