Dramatic And Vivid Luxurious Garden In Procreate Part 1
Posted on 07 Jan 07:52 | by LeeAndro | 8 views

Published 1/2023MP4 | Video: h264, 1280x720 | Audio: AAC, 44.1 KHzLanguage: English | Size: 1.25 GB | Duration: 1h 0m
Clipping Masks and Layering for Dimension
What you'll learn
Learners looking to improve their Procreate Skills
Learners looking for information on how to work with layers and clipping masks in Procreate
Learners looking for knowledge on multiple ways to solve each design challenge
Procreate users looking for methods for keeping art fully editable for later adjustments and recoloring
Requirements
Procreate knowledge is an asset but techniques are explained thoroughly
Description
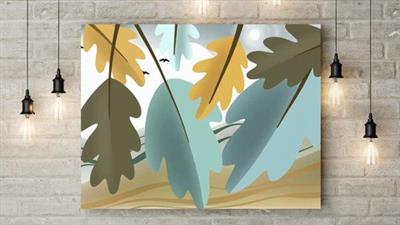
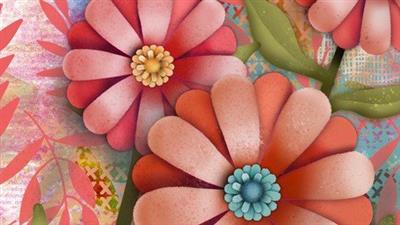
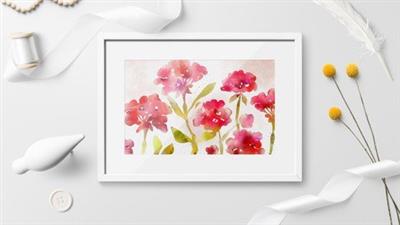
About This ClassIn this class, I am further exploring the use of the Gaussian Blur to help create shadows to show depth on a vibrant floral. My goal is to start with just a single layer for each flower, stem, or leaf. The reasoning behind this is that I know it will take many, many clipping masks to add the depth, so I try to keep it as simple as possible at first. As we progress through the lessons, you will see me add more and I will show you some real-world decisions as I work towards my end goal.This class, Dramatic and Vivid Luxurious Garden in Procreate 1, will be Part 1, with a follow-up Part 2 that will show you many ideas for the finishing. At the end of today's class, you will see we have all the flowers, stems, leaves and fillers ready to go for the follow-up class. I show you my semi-finished layout and talk about some of the finishing touches I want to add. Ideally, I suggest you keep the flowers to one simple shape that you will add the shading to.In this class I'll walk you through:my step-by-step method for blocking in the initial shapestips for creating shadows easily with the Gaussian Blurmy workflow for use of layers and clipping masks to add the dimensionmethods for keeping the art fully editable for later adjustments and recoloringIf you'd like to try something a little bit challeg, this is a great class for you. The challenge is in keeping your head wrapped around the clipping masks and layering. This class will benefit anyone who wishes to learn more about adding dimension and methods to improve efficiency.The key concepts I will include:review of my organization of a complex illustrationa look at how to work with inspiration without copyingapproaches you can take to arrange motifs to compliment positioning of letteringEven if you are not sure what you will use the illustration for, learning new Procreate workflows is recommended. I think this art and technique would make a great greeting card series, for example. It could also be used for prints that a customer can digitally and have printed themselves. I know you will create something dramatic and luxurious, and it's so rewarding. I can't wait to see your finished piece!Intro to Dramatic and Vivid Luxurious Garden in ProcreateThis short intro will give you an overview of the class Dramatic and Vivid Luxurious Garden in Procreate.Lesson 1: Inspiration and OverviewIn this lesson, we will take a look at what inspired me for this class. We look at the work of JP Patra on both Pinterest and Dribble.Lesson 2: Blocking in the lower ShapesIn this lesson, I will break down the complete process of choosing what brushes to use as well as showing you my sketch of flower shapes. I suggest you go through the whole class before you do your illustration, or you can pause the class and do your drawing in preparation. I paint the flowers and I explain the reasoning behind the choices I make with regards to layering. I show you color drop for filling and by the end of the lesson, we have most of the shapes complete.Lesson 3: Touch-Ups and Shading TechniquesIn this lesson, I will explain the creation of the shadows on each of the petals to show dimension on the flowers. I will show you two key techniques I use and explain every step of the way. By the end of the lesson, you will have the bnings of a dimensional flower by using the Gaussian Blur and the eraser throughout.Lesson 4: Expents with OverlapsThis is the lesson in which we expent with the layer order. I want to be sure that it all makes sense and gives us the dimension in the way it works best. I show you a method to layer the shadow clipping masks to achieve that goal.Lesson 5: Multi-Part Motif IssuesIn this lesson, we will be taking a close look at the layering. I will be finalizing the flowers and some of the leaves and that will include creating clipping masks to make all the shadows work. There are a few tricky spots, and you will see as I expent with different techniques. We are one step closer to finalizing our design now.Lesson 6: Starting the Finishing TouchesAt this stage, I will show you the finishing of all the additional motifs. We take a quick look at color adjustments and change some of the layer orders, as well as grouping and flattening to make our dimension additions easier. This is the last step before adding background details. I will be adding the background color into the piece and then we will talk about what you will see in the follow-up class.Lesson 7: Conclusion and Closing ThoughtsWe will conclude everything in this lesson. I will chat about next steps which will include the follow-up class. Hope to see you there!Concepts covered:Concepts covered include but are not limited to Procreate floral design, layering, filling with recolor, working with a sketch on darken blend mode, Procreate canvas settings, brush settings, Procreate snapping and guides, Procreate floral brush creation, the Brush Studio in Procreate, adjusting Procreate brushes, hue and saturation adjustments, sizing of documents and brushes, adding texture with brushes, Procreate brushes for adding other interesting details, workflow best practices, painting best practice, Procreate composites, techniques with paints and blending, and much more.Project DescriptionCreate a pencil sketch that will act as your guide for creating the finished art. Place this sketch at the top of your layers and set it to Darken Blend Mode. Block in your basic shapes with as few layers as possible. Work through each of the lessons, applying the concepts as I teach them. Expent with using the Gaussian Blur method and the Soft Airbrush method to see which you prefer.
Overview
Section 1: Introduction
Lecture 1 Lesson 1: Inspiration and Overview
Lecture 2 Lesson 2: Blocking in the Flower Shapes
Lecture 3 Lesson 3: Touch-Ups and Shading Techniques
Lecture 4 Lesson 4: Expents with Overlaps
Lecture 5 Lesson 5
Lecture 6 Lesson 6
Lecture 7 Lesson 7: Conclusion and Closing Thoughts
Bner Procreate users wanting to learn additional techniques
HomePage:
https://www.udemy.com/course/dramatic-and-vivid-luxurious-garden-in-procreate-part-1/DOWNLOAD
1dl
https://1dl.net/9nnyxd9hiy55/wmqnGNbq__Dramatic_a.part1.rar
https://1dl.net/5tw0s5pwdha4/wmqnGNbq__Dramatic_a.part2.rar
uploadgig
https://uploadgig.com/file/download/25520224f5222fa0/wmqnGNbq__Dramatic_a.part1.rar
https://uploadgig.com/file/download/93A55fd3580860Bb/wmqnGNbq__Dramatic_a.part2.rar
rapidgator
https://rapidgator.net/file/b33be5aa7489d202eab4e5e8577cf12d/wmqnGNbq__Dramatic_a.part1.rar.html
https://rapidgator.net/file/5267a5a43ee9042ef6555ba151b4af6a/wmqnGNbq__Dramatic_a.part2.rar.html
Related News
System Comment
Information
 Users of Visitor are not allowed to comment this publication.
Facebook Comment
Member Area
Top News


